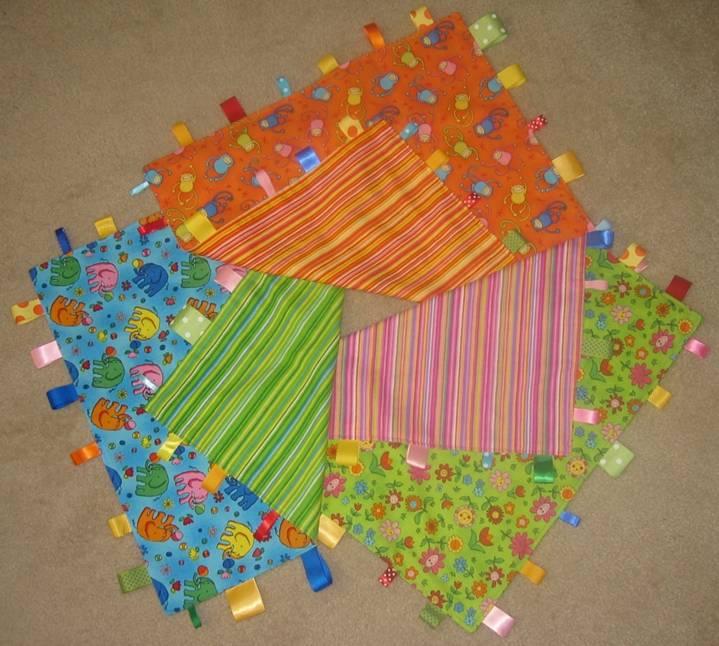

If you google "taggie blanket tutorial" I'm sure you'll turn up dozens of links far better than anything I could write up here, especially since I didn't take photos of the process. But trust me, it's easy. It was my first sewing project, and I'm no seamstress. But in case you're too lazy to google, here's the gist:
- cut two squares of complementary fabric (cotton, flannel, satin, minky, whatever you like, I made mine anywhere from 15-18" square) and about twenty lengths of ribbon (satin, grosgrain, wide, skinny... again, whatever suits you, mine were 4-6" each).
- pin your squares of fabric, right sides together, and tack the ribbons around the edges, about 5 per side. The ribbons should be folded in half, with the looped end sandwiched between the fabric layers and the cut ends sticking out beyond the fabric just a little.
- sew around the perimeter, leaving a gap on one side between two ribbons so that you can turn the blanket right-side out.
- snip your corners, turn right-side-out, poke the corners out, press the seams flat (especially the gap that is not sewn closed yet), and then sew around the perimeter again, close to the edge but just inside it. (This will close the gap; no hand-stitching required.) If you have decorative stitches on your machine, this may be a fun time to use them.
(I'm backdating this because it's old. I actually made the first taggies on 5/19/2007, but I didn't want this to appear as my very first blog entry)
No comments:
Post a Comment